Almost everyone in the Wi-Fi space who has touched a 3D printer has wondered, “Could we print antenna patterns?”
For anyone who has worked in Wi-Fi, the use cases are immediately apparent. Antenna patterns are an abstract concept, showing the gain of an antenna every degree, or every few degrees. Typically, we only get to view these patterns in 2D with an elevation and azimuth pattern on the AP or antenna data sheet. If you’re used to reading patterns, it’s not difficult, but for a newcomer or non-technical person (like a manager or customer), they’re difficult to grok.
In this video we’ll show you how you can use PrusaSlicer, a free and open-source software known for its advanced processing functions and compatibility with various 3D printers, to bring antenna patterns to life.
Visualizing antenna patterns in 3D helps quite a bit! I myself use it for “antenna shopping” – while I’m doing a design, I like to browse around and look for patterns that fit my use case.
The next level, of course, would be to have something you can hold in your hand. With a physical item, you could:
- Take a physical example of the antenna to a customer meeting to help explain why you chose the specific hardware that you did
- Compare different types on antennas (such as a high-density patch, yagi, and omin) in a classroom
- Compare low-gain and high-gain omni-directional antennas, to show how they cover differently (and how high-gain isn’t necessarily “better”)
Obviously, there’s also the “fun” aspect of it. I’m sure a bunch of us would love to have a collection of antenna patterns on the shelf, right next to our old 802.11b PC Cards and favorite enterprise-grade access points.
To say, “we’ve wanted this for awhile” would be a huge understatement. When the opportunity came up to add a Download button to Hamina Network Planner, we knew what we had to do.
Downloading the Antenna Patterns
In Hamina Network Planner, for select AP and antenna vendors, the 3D antenna pattern viewer now features a “Download” button! You can select a specific AP or external antenna model, select the desire band, and download an .OBJ file of the 3D pattern. This is the exact same geometry that we render in the viewer, and the same geometry that we use in our predictive models.
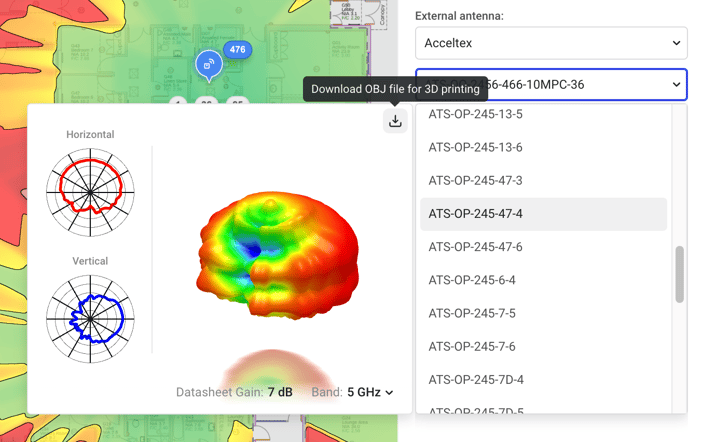
The .OBJ file also has a neat trick, where it colors each vertex based on the gain of the antenna, so the high and low-gain angles “pop” a bit more.
Preparing the Pattern
To 3D print the pattern, we need to turn the 3D model into GCODE, which is a set of movement instructions that the printer follows to print the part. To turn the model into GCODE, we use an application called a “Slicer”, in a process called “Slicing”.
Our preferred slicer is PrusaSlicer, which is constantly updated and improved, is free and open source, and is compatible with tons of 3D printers. Of course, it also works flawlessly with Prusa’s line of 3D printers, such as the Prusa MINI, Prusa MK3S+, and Prusa MK4.
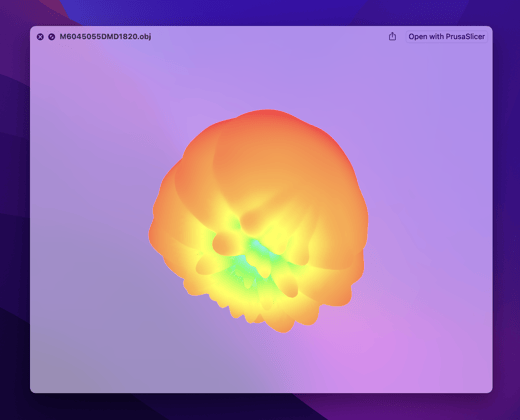
PrusaSlicer also effortlessly handles our .OBJ files – all you need to do is drag and drop the file into PrusaSlicer.
Scaling the Pattern
When you open the file in PrusaSlicer, it will offer to convert the units of measure from inches to millimeters. Click the Yes button.
Next, you’ll probably still want to scale up the antenna model a bit more. Use the Scale tool to manually change it, or use the Scale factor fields in the lower left to define a specific scale.
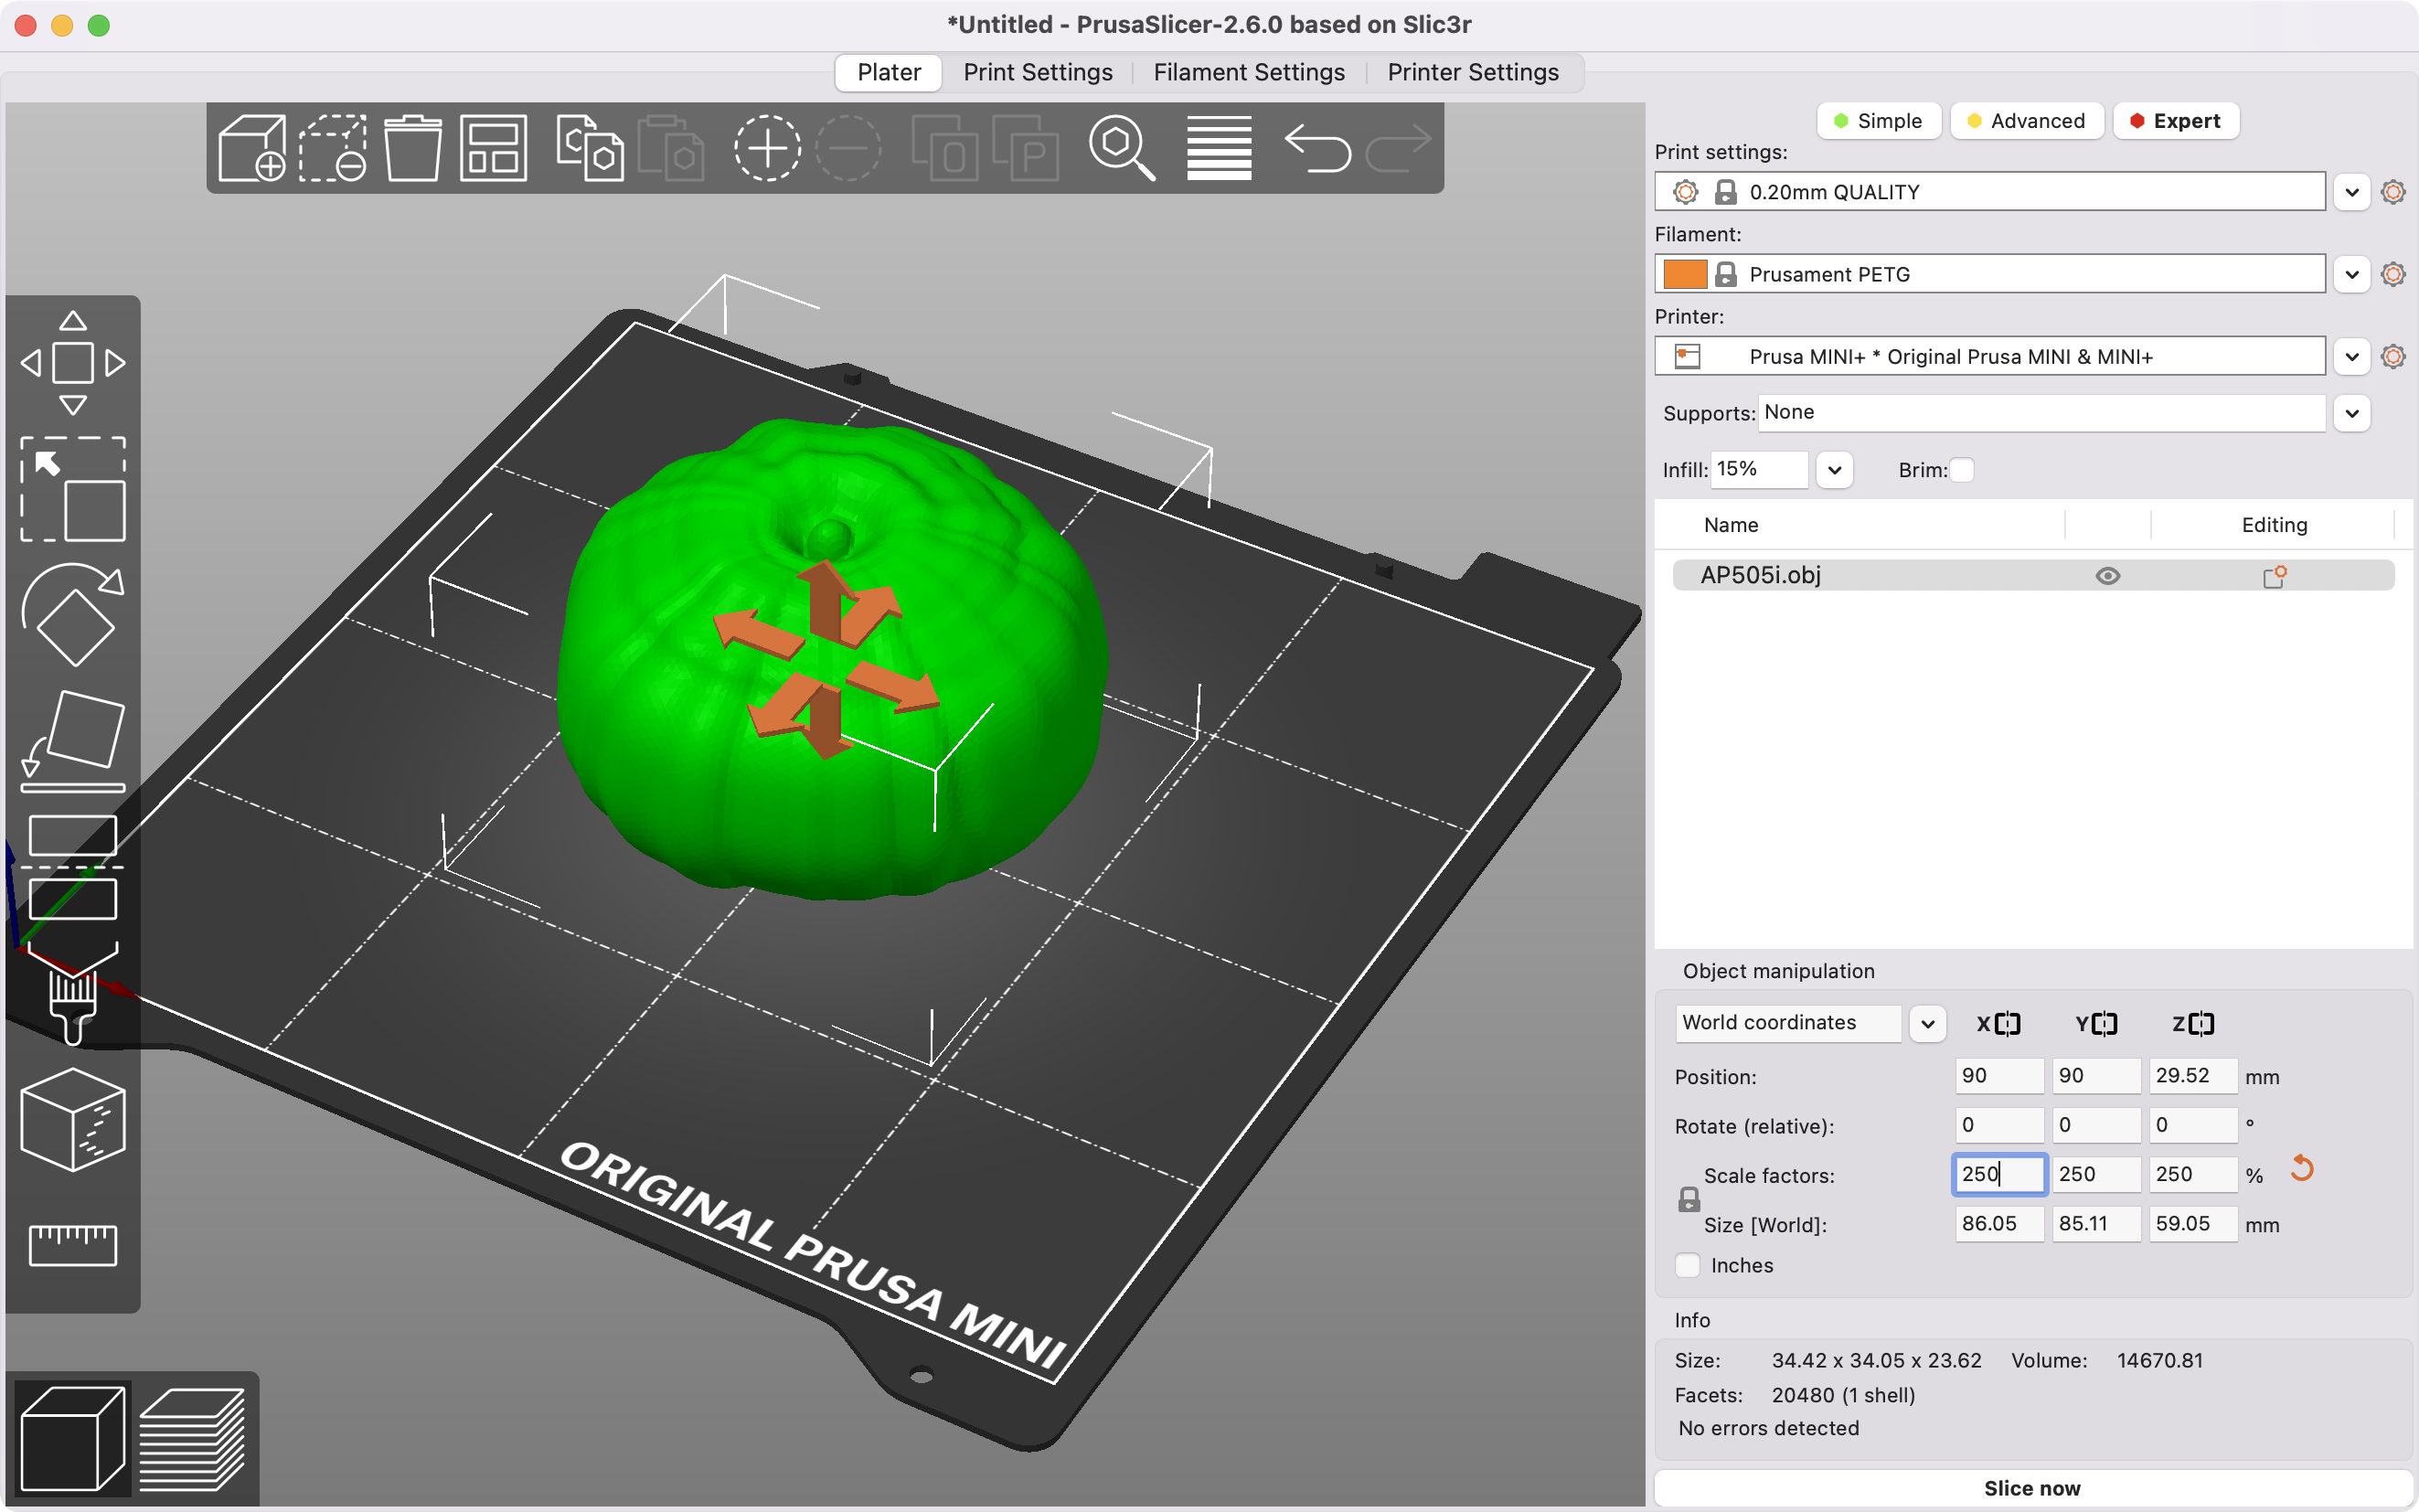
For my Prusa MINI, a scale factor of 250 was about right. Most patterns end up at about ¼ of the build volume on the printer, so I can easily print the entire pattern in one go that ends up being about the size of a piece of fruit.
Tip: If you’re printing multiple patterns for comparison, use a consistent scale factor.
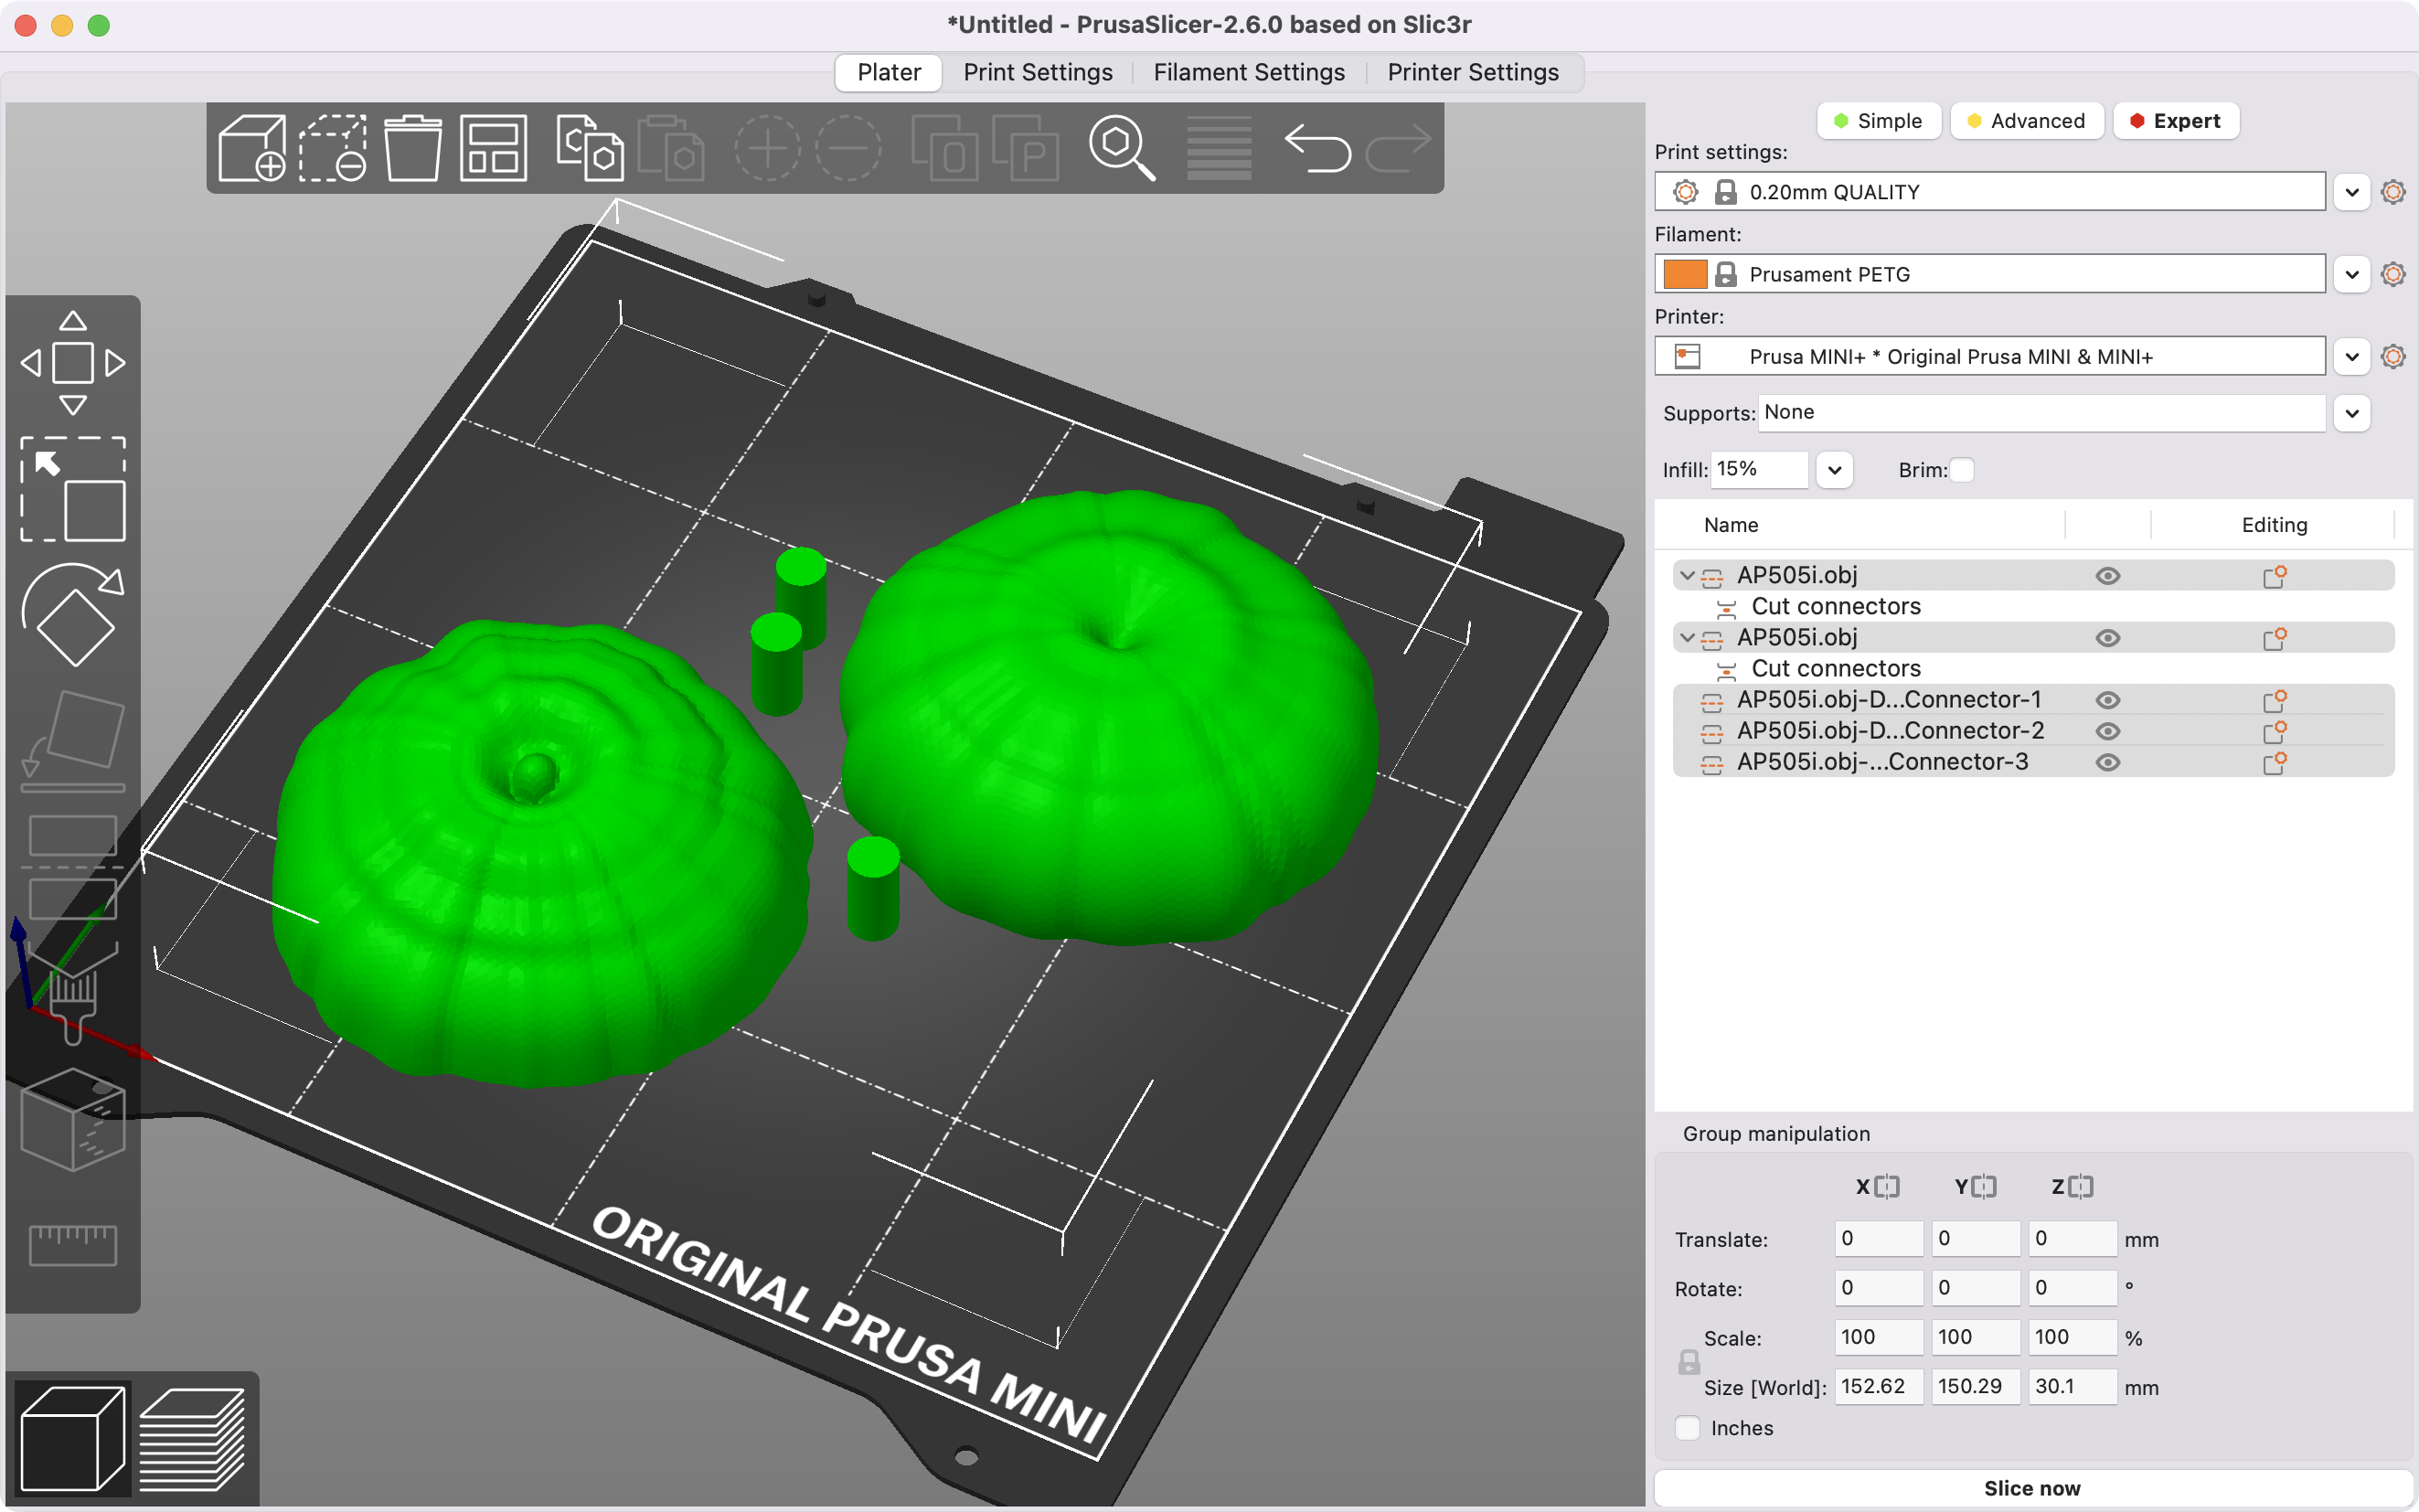
Cutting the Pattern in Half
Printed parts work best when they have a large, flat surface to stick to the build plate. Since antenna patterns typically have no flat parts, and easy way to fix this is to cut the part in half, and print the cut parts facing down. The newly-released PrusaSlicer 2.6 adds a new feature that simultaneously cuts the part in half, and generates dowels and holes to snap the parts together after printing. Here’s how to use it:
-
Click on the part, so it turns green
-
Select the Cut tool on the left
-
Set the cut position about halfway up the model
-
Set both Object A and Object B to Place on cut
-
Click the Add connectors button
-
Select the Dowel type
-
Set the Depth of the dowel, which was 8 mm for us
(with a 0.5 mm tolerance for a perfect fit) -
Set the Size of the dowel, which was 8 mm for us
(with a 0.1 mm tolerance for a perfect fit) -
Click on the face of the part to place the dowels and holes (we use about three)
-
Click Confirm connectors
-
Click Perform cut
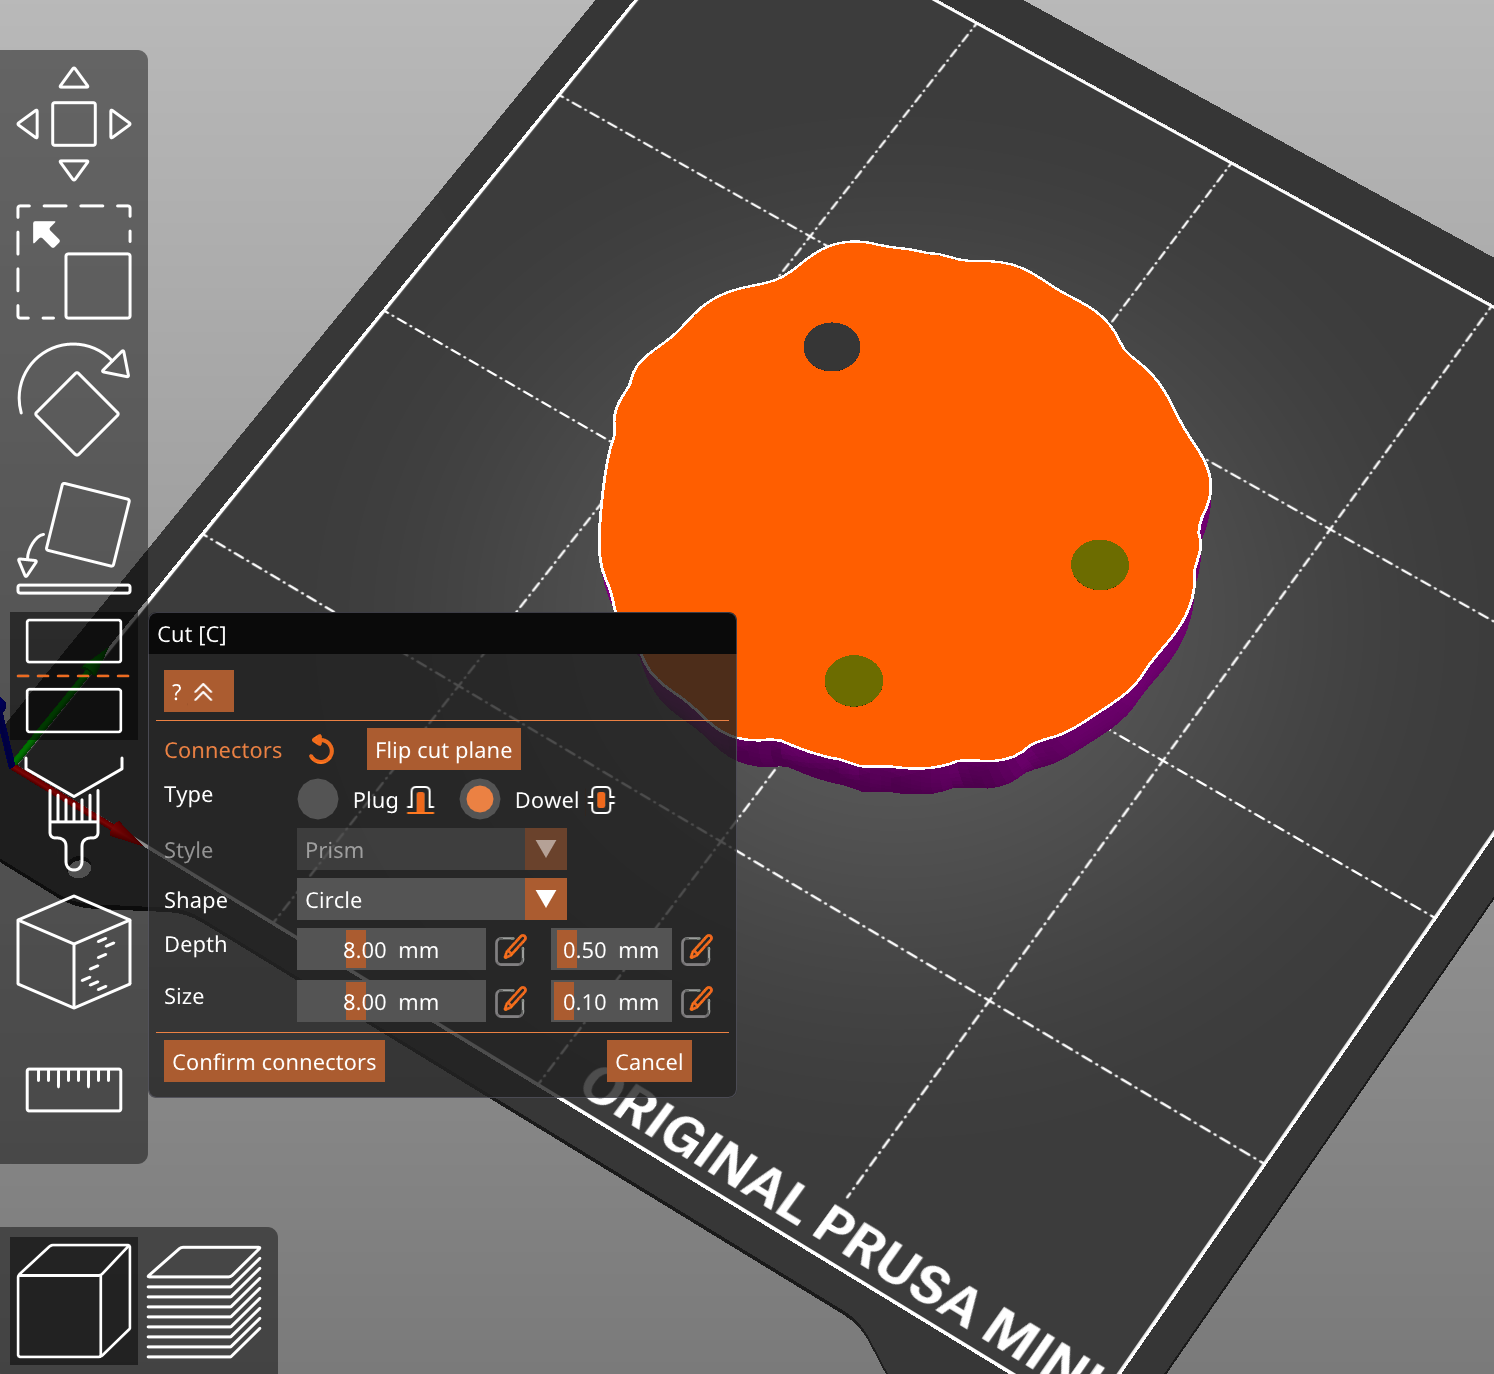
PrusaSlicer should now automatically cut the part, flip over the parts so they print face-down, add holes, and generate dowels.
Did I mention that I love PrusaSlicer? Is this blog even about Hamina?
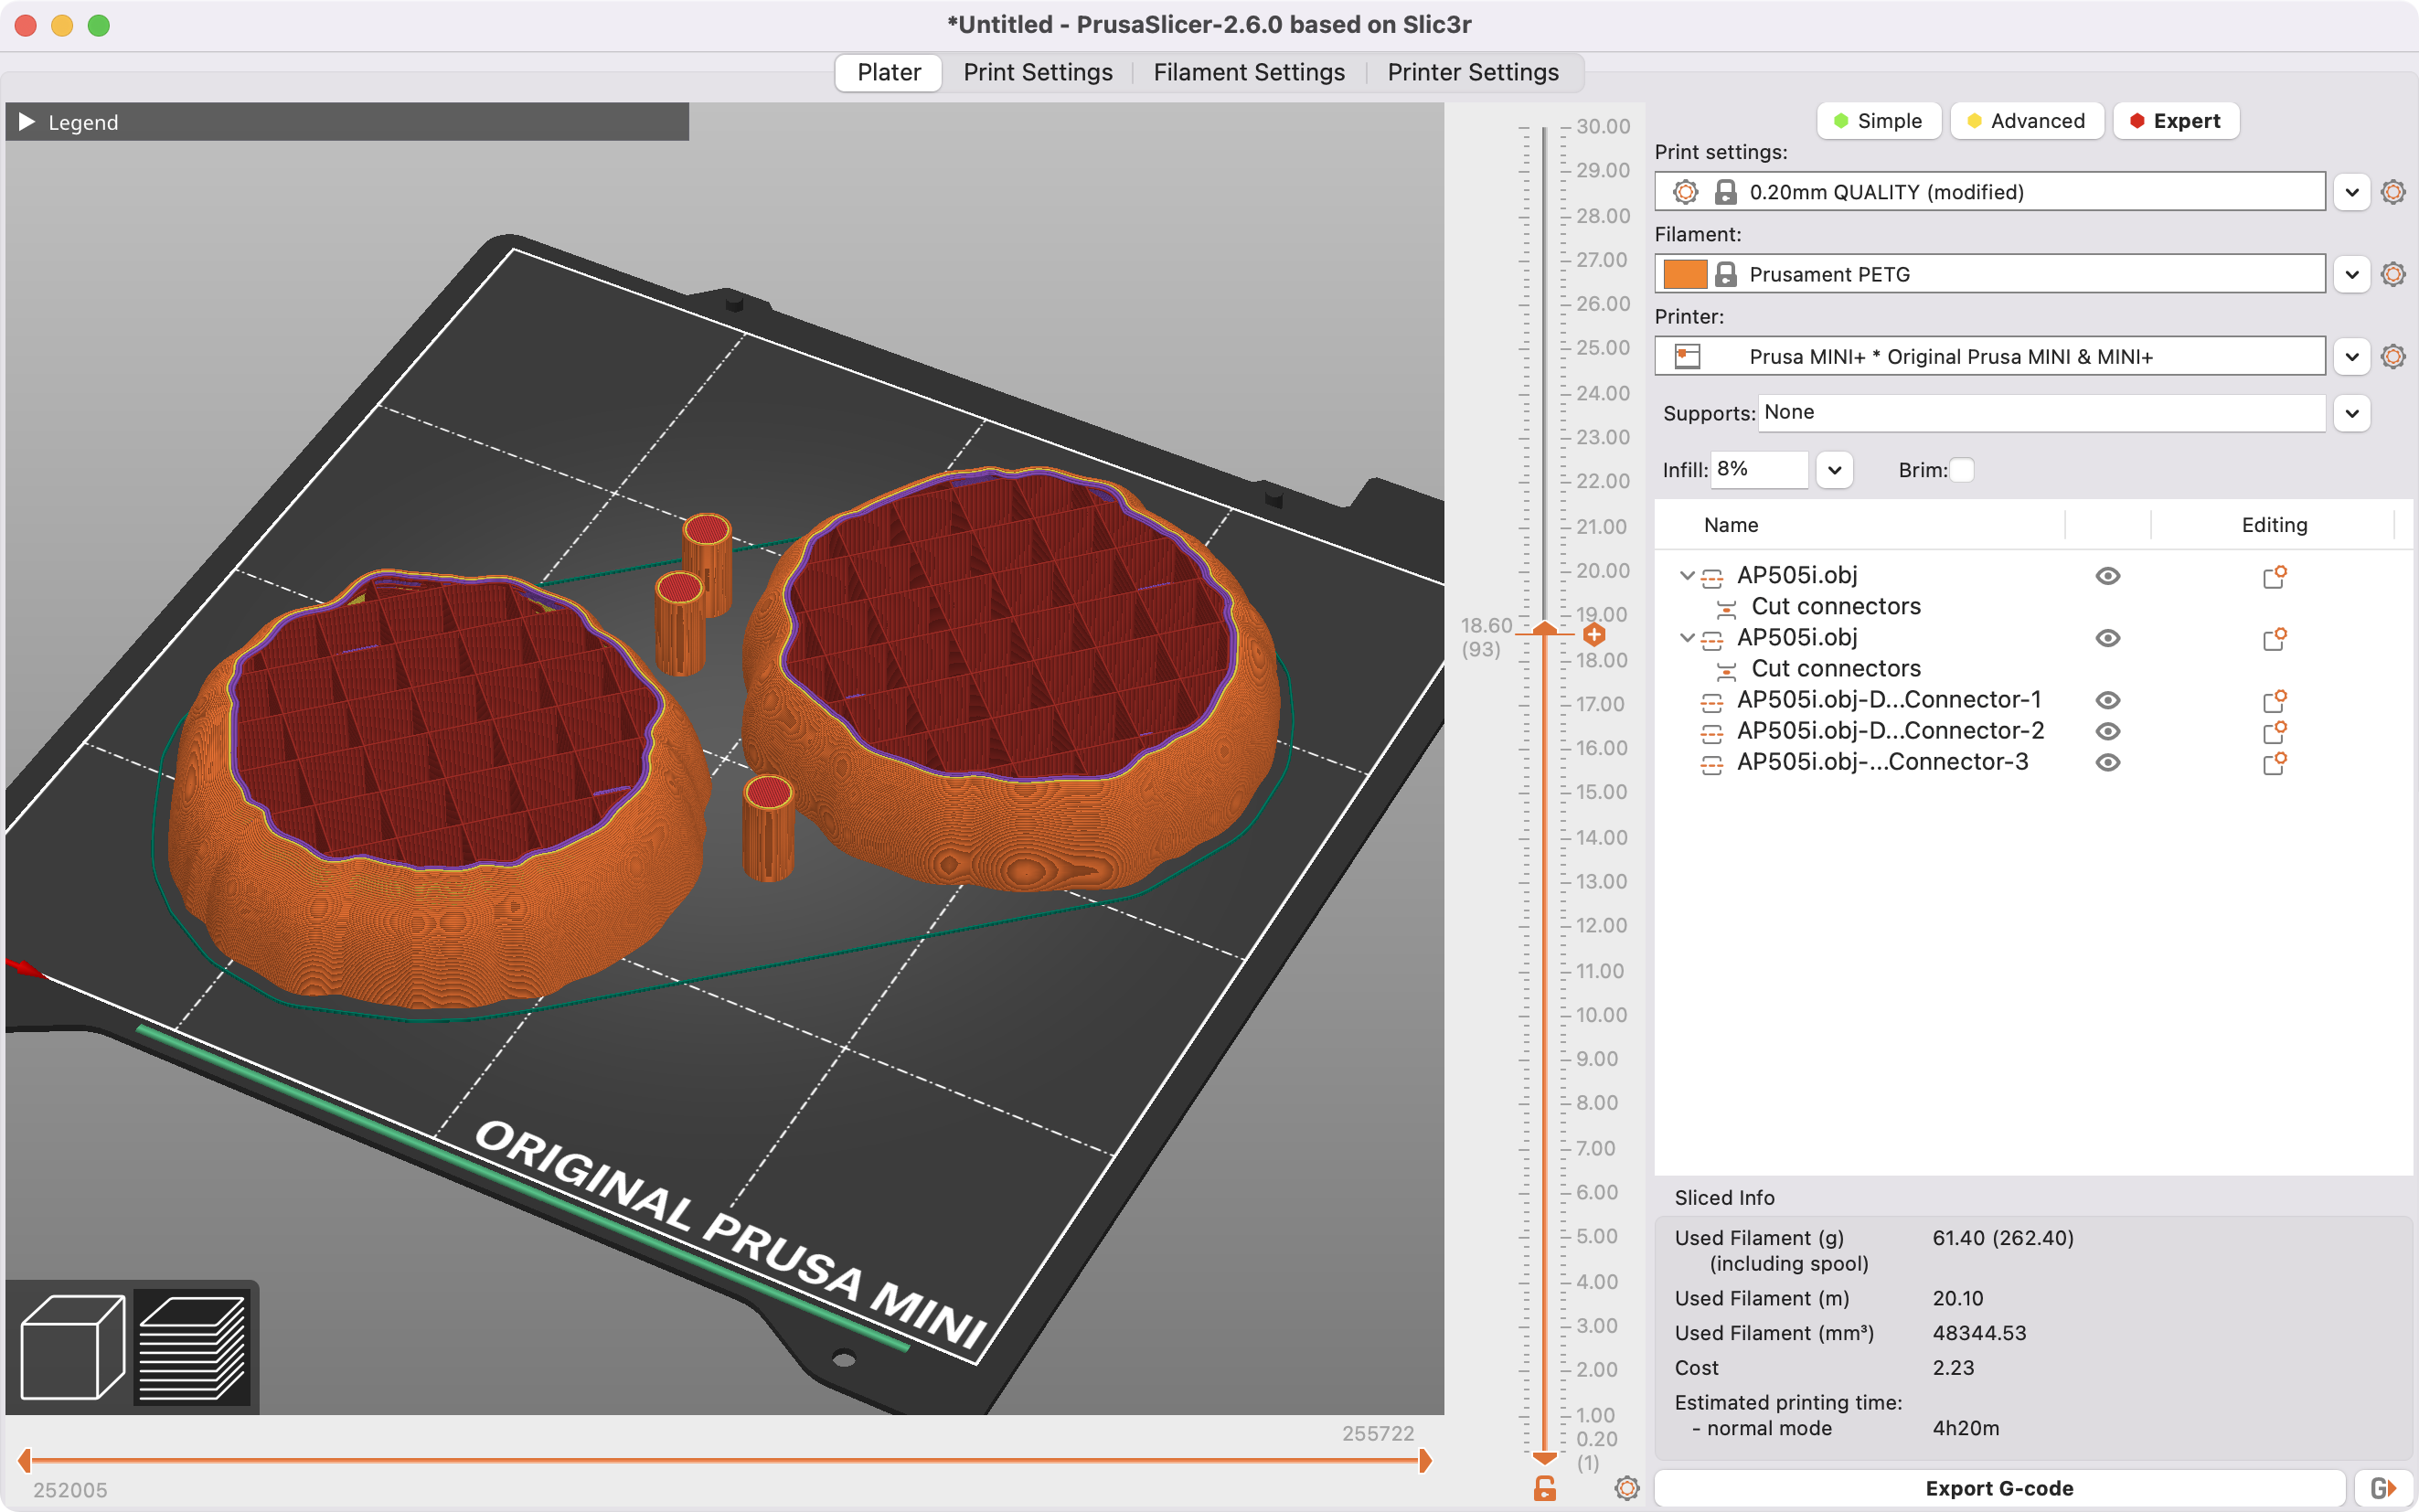
Slicing the Part
From here, it’s business as usual! For my antennas, I like to use the 0.20mm QUALITY preset, but I switch to Grid infill, and back it down to about 8 percent. For most antennas, support isn’t needed, but you might need to generate it if there are any overhangs.
Bonus points if you upload your GCODE over Wi-Fi!
Assembling the Antenna Pattern
Once the print is done, it should be a simple snap fit! Your mileage may vary, as there tends to be some tolerance differences between printers. With the settings above, I got a very satisfying “snap” as the parts went together. Oh yeah, that’s not going anywhere.

Downloadable antenna patterns are currently available for AccelTex, Ventev, and Extreme Networks antennas. If you are an AP or antenna vendor, and you’d like us to enable downloadable antenna patterns for your hardware, get in touch with me at joel@hamina.com.
Happy printing, and happy Wi-Fi designing!
Joel
Got a 3D printer? Then what are you still doing here? Get started printing your 3D antenna patterns. Love 3D antenna patterns & just want to use Hamina Network Planner? Say no more, we’ve got you covered. Still not convinced (how dare you)? Book a demo with one of our product experts.